Posts

Showing posts with the label Reverse French Tip Nails

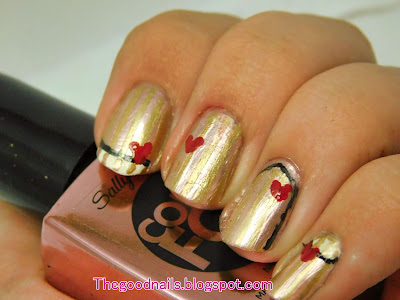
Hearts and Stripes French Tip and Reverse French tip Nail Art Tutorial for Valentines Day
Image
Hiya! What's on and going, everybody? Are you looking forwards to Valentines day? If so, I have the nails for YOU! These were so much fun to do, and they make use french tips in multiple positions! The base colour that I used for these was Sally Hansen's Rose Copper from the Color Foil Range . It's such a pretty colour for valentines day, sooo pretty~! Now, are you ready to get this art on your nails?                                           Look~at~those~hearts! First off, we are going to apply our striping tape. You will need about five pieces. Start by placing one piece in the centre and then place the other pieces so that they line up evenly. One tip I got for you guys is to use your cuticle nippers to place the striping tape on your nail, you can use them like tweezers. For more tips on using striping tape you may like to read this blog post. Next, paint ove...

Monochrome Dotted Reverse French Tip nails Wrapped in a Ribbon Nail Art Tutorial

Image
Guys! Hello! Welcome to another nail art tutorial! Today I will be teaching you how to do a perfect reverse french tip mani, but were gonna make it real special with monochrome dots and wrap it all up in a pretty pink bow! Are you ready? Let's go! Our fist step in making the perfect reverse french tip is to make an outline so that we can fill it in lately. On a white base coat (I used two coats of Blanc by Essie) take a small nail art brush and with black nail polish create a large oval shape.This doesen't need to be very neat or opaque because it is just an outline and we will be filling it in in just a second! Now, take the brush from your nail polish bottle and fill in the outline to create the reverse french tip look. I find that this method is a lot neater and easier than others that I have seen, where an outline is not used. Remember to go riiiight to the bottom of your outline to get it nice and opaque. The next thing that we're gon...

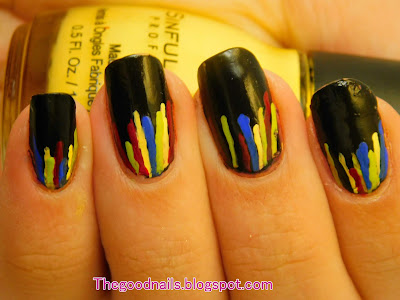
Reverse French Tip Fireworks Inspired Nail Art Tutorial For New Years

Image
Hiya! The new year is almost upon us guys! Yesterday, I went shopping again to try and pick up some more (nail related) Boxing day bargains, and had a pretty successful haul! I will be sharing my goodies and their swatches with you all very soon, so look forward to it kay' ;). For now I have a simple and pretty nail art tutorial for the New Years! These nails are inspired by New Years fireworks! They were very easy, but a bit time consuming. To start, paint your nails with 1 to 2 coats of black nail polish. Then take your first colour and make a stripe at the end of your nail. Next to this stripe, take another colour and paint another stripe at a different length. Continue this process until you come to the end of your nail plate. A lil' tip I got for you is to keep looking at your work to make sure that the stripes are lining up and lookin' okay. I reckon these would look real pretty with a matte top coat! The polishes that I used in these here nails were, Si...

Festive Reverse French Tip Wreaths on a Chimney Nail Art Tutorial for Christmas

Image
Hey there! Today I have another nail art tutorial for you all! I thought that chimney nails might be a fun idea for Christmas and a cool way to add some more festive cheer to chimneys is to put some wreaths on them! I reckon' these chimney nails are fit for Santa Clause ;) The polishes I used for these nails are: Revlon Espresso, Revlon Jaded Night, Revlon Red by Revlon and White Chocolate by Savvy by DB. After painting your nails white, use brown nail polish to create squares of varying lengths in order to create a brick design, then fill them in. You may need to go over them twice in order to achieve full opacity. The next step is to create a wreath design on the end of the nail. To do this use a nail art brush to and draw spikes in slightly different sizes to make leaves. Do this again underneath your current design and then fill in the space between them. The very last step is to draw the ribbon. Start by drawing a small heart and fill this in. Then, draw two...